Resize/Maximize the default Logical Volume in Ubuntu


You may have noticed that when installing Ubuntu form a USB disk, that it created a default mount point on your disk that is only about 20% of the full capacity of the disk.
Perhaps 100 or 200GB of your 1TB disk.
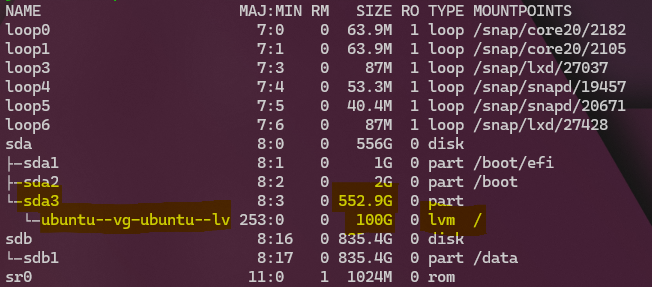
Using the command lsblk you might see your main partition being much larger than the logical volume mounted to it.
Below, you can see disk a partition 3 sda3 is 553GB, but the logical volume ubuntu--vg-ubuntu--lv attached to root / is only 100GB.
If you didn't notice this happen, or perhaps weren't sure it was safe to change the defaults during the guided installation process, you'll probably want to fix that now to get access to your full disk!
Using various command-line tools, you can resize your volume easily.
1. Check the current size of the logical volume using df (or duf if you have it installed):df -hT /dev/mapper/ubuntu--vg-ubuntu--lv

2. Check if you can actually perform the resize, buy testing the command first (with the -t option):sudo lvresize -tvl +100%FREE /dev/mapper/ubuntu--vg-ubuntu--lv
3. Resize the logical volume for real:sudo lvresize -vl +100%FREE /dev/mapper/ubuntu--vg-ubuntu--lv

4. Resize the filesystem to match:sudo resize2fs -p /dev/mapper/ubuntu--vg-ubuntu--lv

5. Finally, check the size of the logical volume to ensure everything was successful:df -hT /dev/mapper/ubuntu--vg-ubuntu--lv

Using the df or duf command, you see an overvie of your new disk layout:
